Client Site Maintenance
At Warschawski we offer a client hosting service package which includes monthly updates. It’s part of the dev team’s job to ensure that these updates are made frequently and consistently. This guide will show you our overall process and how to update these sites yourself.
Table of Contents
W Monitor: Centralized Management System
Making updates to many sites can be tedious. To ease this pain we employ a centralized management system called MainWP. Here are the steps needed to log in and view the updates available for our hosted sites:
- Login to https://monitor.warschawski.com/wp-admin/ (credentials can be found in 1Password)
- Head to Sites > Manage Sites in the sidebar
- Click the Sync Dashboard with Sites button in the top right corner. This will sync all client sites and give you up-to-date information about any available updates.
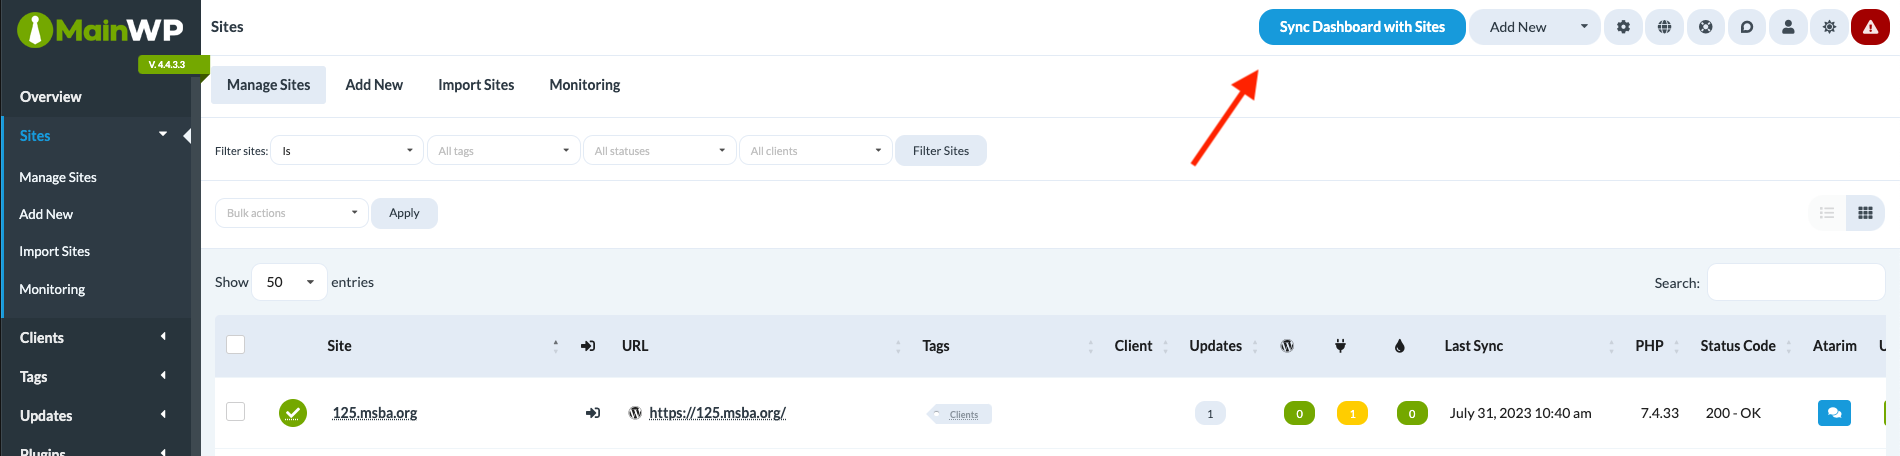
- Open the site overview by clicking the site name in the site column. This page will display info about the site and any updates available.
- Identify what kind of updates are needed. Some need more extra care than others. Generally, you will encounter these:
- Various plugin updates that introduce minor versions or patches. These are the normal kind of updates that will require just a database backup and a visual frontend check. After backing up, you can update on the live site.
- WordPress updates that introduce new core blocks that are not part of our builds. You will need to add/remove core blocks to the ban list found in the site’s repo. After backing up, you will want to update locally.
- Plugin updates that introduce a major version. There may be breaking changes to any hooks we use. It is recommended that you read the plugin’s update log and test locally. After backing up, you will want to update locally.
- WooCommerce plugin updates. These may have updated templates which may have breaking changes. Again, reading update logs and testing specifically for WooCommerce is recommended. After backing up, you will want to update locally.
- Updraft Plus plugin updates. These updates are required to be done on the live server since it needs to be active with a valid license key to update. After backing up, make the update on the live site.
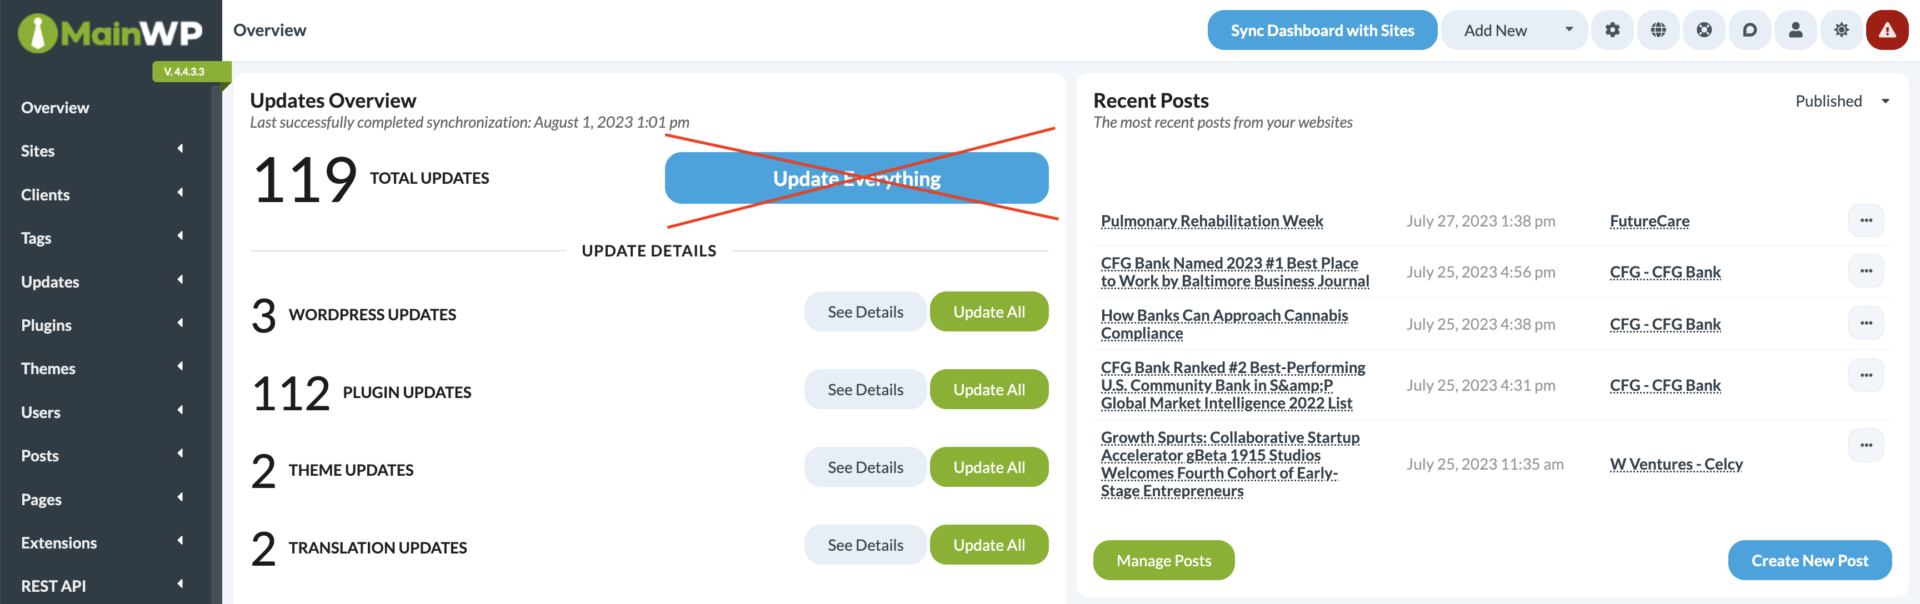
Warning: Never run updates directly in Main WP. Only use Main WP to identify what sites need updating and what kind of updates need to be made.
Backup Up Before You Update
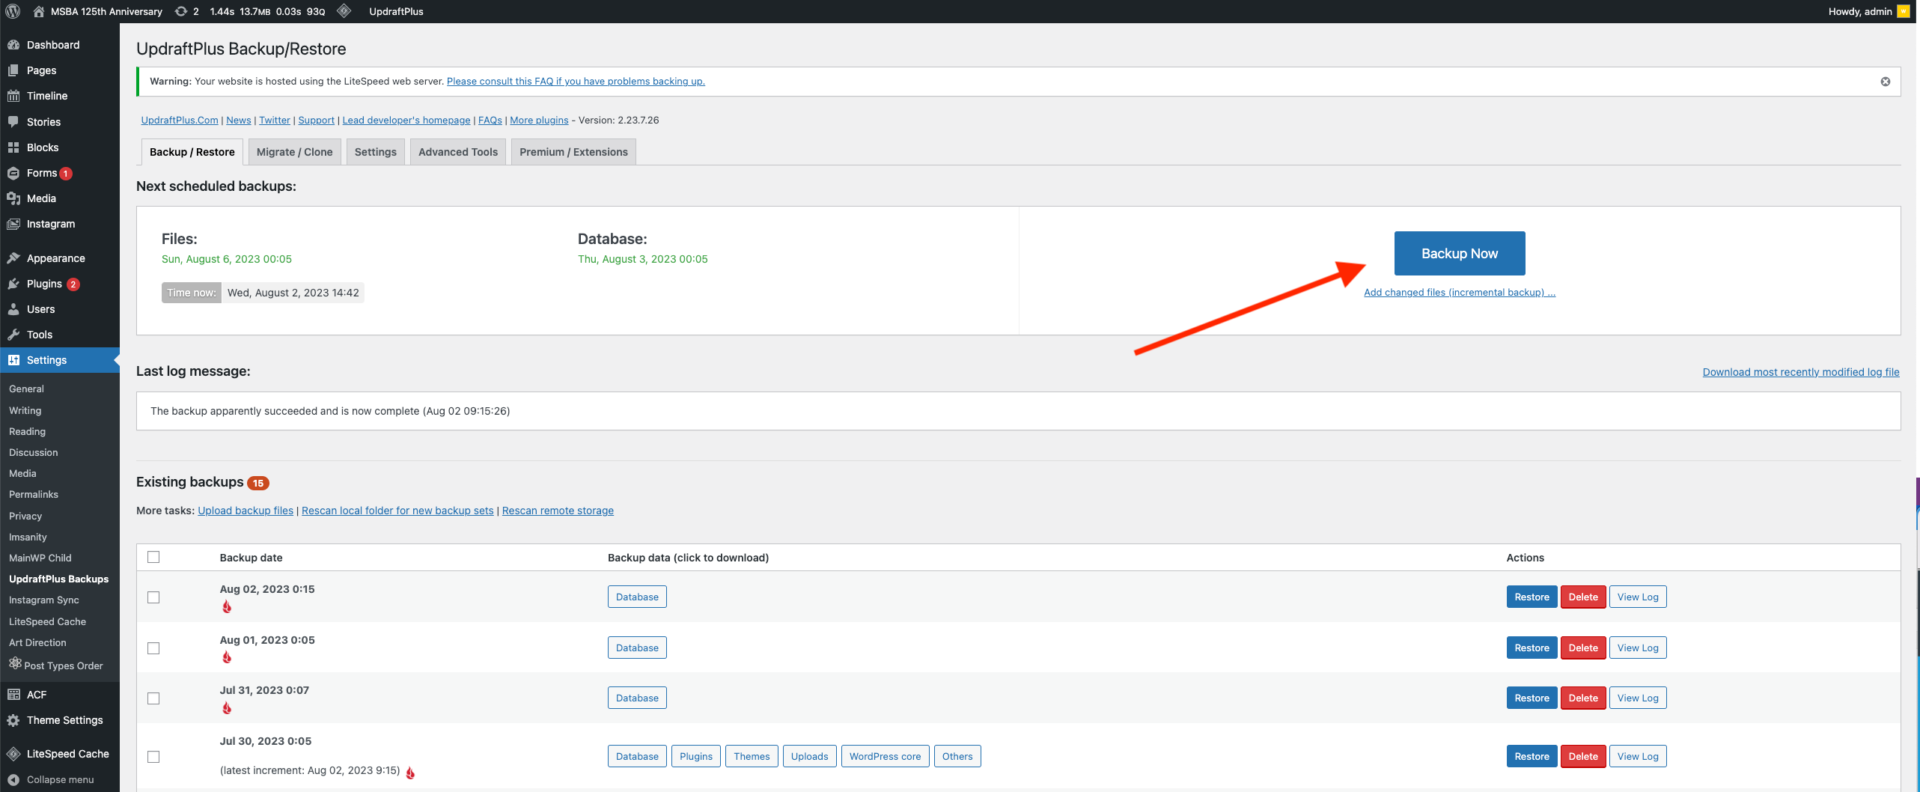
Once you’ve identified the updates start the process by backing up. Always backup the database before updating. Every site we maintain contains the UpdraftPlus plugin that handles the backup. We also commit any code on the client site to create a ‘restore point’ in case anything goes wrong. Here are the steps to take:
- SSH into the client site and commit any code edits. Something like ‘Pre-update’ works as a message. If the repo is clean, move on to the next step (make sure your SSH key has been added and authorized on the client’s server, if not, do that now).
# wturbo is a shorthand function we use to ssh into clients' sites
wturbo client-name
cd path/to/site-repo
git status
# commit any work- Login to the site’s admin and run a database backup via UpdraftPlus.
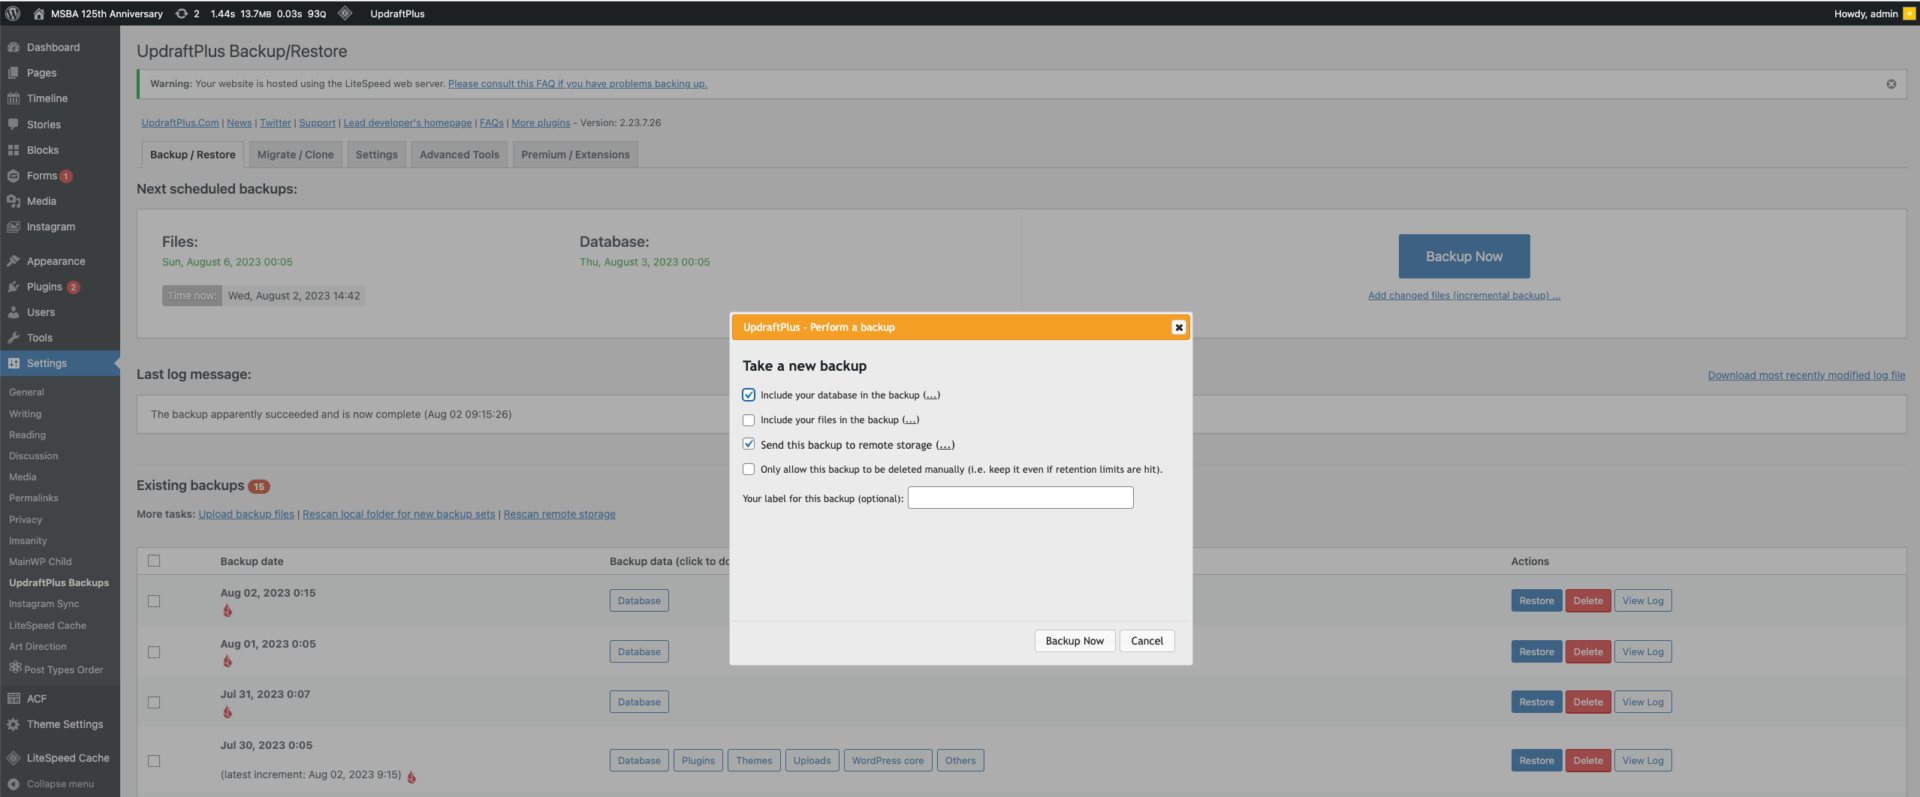
- Updraft will allow you to toggle a few options. Toggle the first and third options (include the database and send it to remote storage) and then click Backup Now. This may take a few minutes depending on the size of the site.
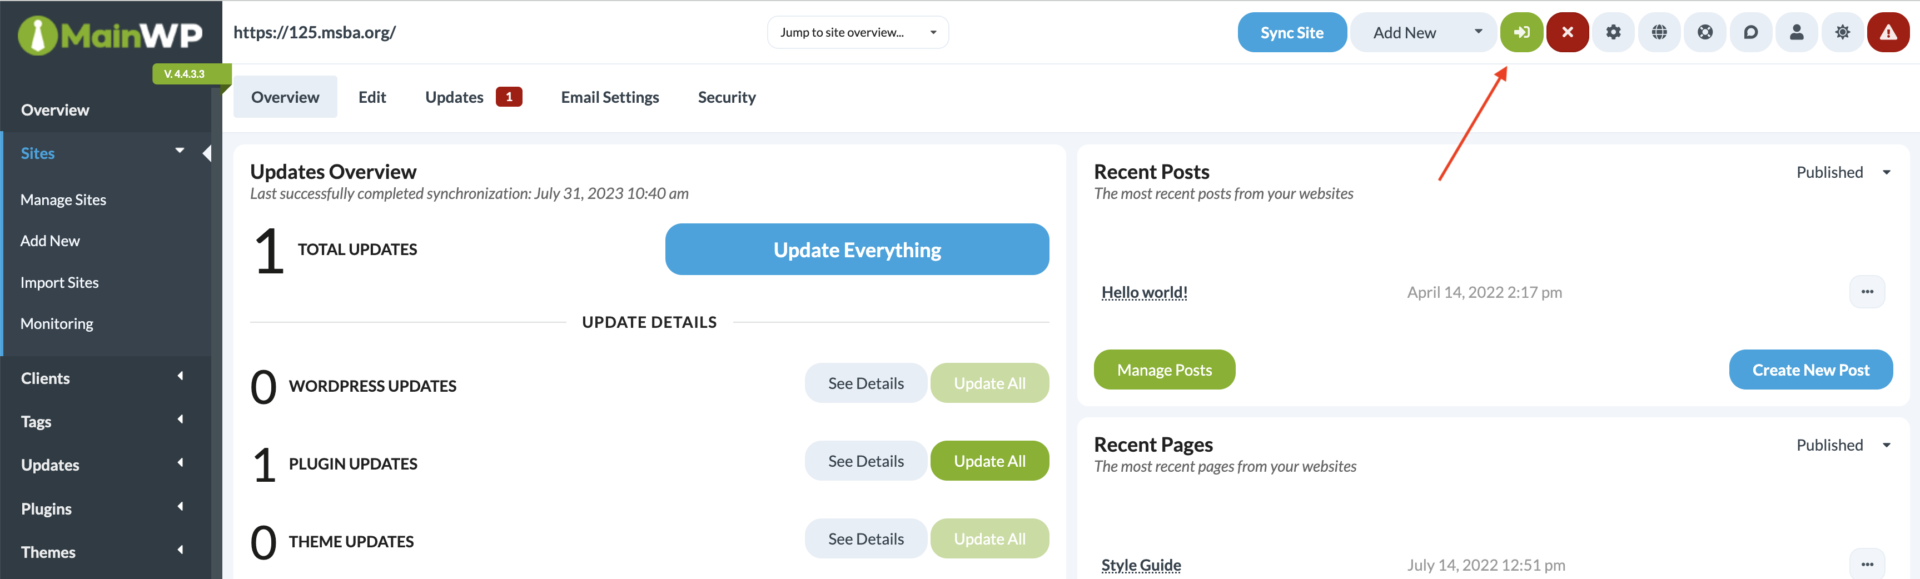
Tip: You can instantly log into a client’s site WP admin via the login button in the top right corner of Main WP. It’s incredibly handy when updating multiple sites.
Updating with a Local Copy
After backing up you are ready to update plugins. If your updates include a major version or WordPress update that introduces core blocks, you should run updates on a local copy of the site. On a local copy you should be able to test any changes and you won’t have to worry about bringing the live site down. Here are the steps to test on your local:
- If you don’t have a local copy of the site:
- Log into the WHM Host Server and grab a copy of the database and uploads.
- Clone the repo from W’s Bitbucket.
- Set up the site like you normally would when setting up a build.
- If you do have a local copy, pull the latest commits from the repo (and optionally pull down a copy of the database and uploads folder from the WHM Host Server).
- Run the updates. If it is a WordPress update that introduces new core blocks refer to the New Core Blocks section below.
- Test any changes. This means going through the site overall but looking closely at the parts the plugin affects.
- If everything looks good, you can commit and push the updates.
- SSH into the server where the live site lives and pull the updates.
- Go through the live site and make sure nothing is broken (both admin and frontend). If things break refer to the troubleshooting section below.
- 🎉 Congrats! The site has been updated successfully.
Updating on the Live Site
If your updates are small and only include minor versions and patches, you should be able to update plugins on the live site. Here are the steps to update:
- After backing up the database, go over to the plugin page and click the Updates Available tab near the top.
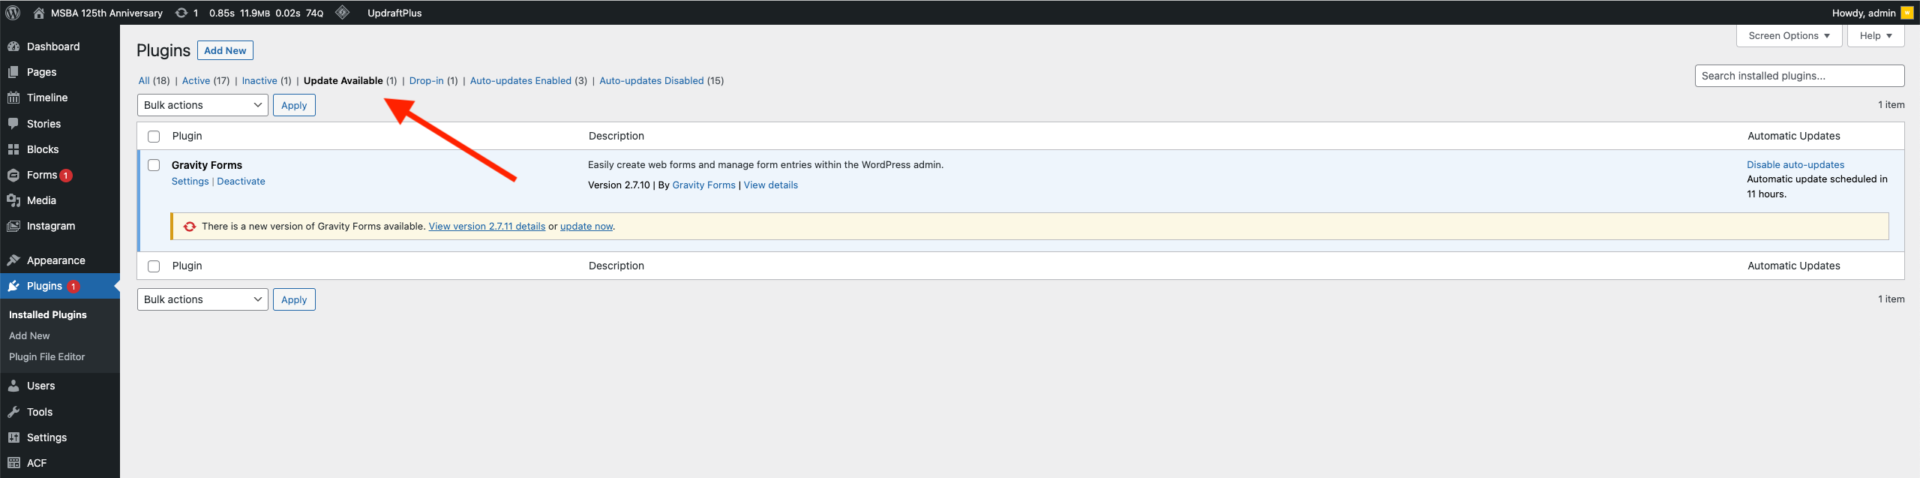
- Run updates one at a time and test between each update. Testing means clicking through the site overall and then looking closely at the parts of the site the plugin affects. In the admin, edit a page or post to make sure the editor loads.
Example: Your updates include a minor version for Gravity Forms. When you update GF, go through the frontend and visually check everything looks fine. Then go to a form and test it. Try submitting with empty fields and confirm everything works. Then test the admin by editing a page to confirm it loads. Check the admin gravity form pages to confirm they load, too.
- If everything looks good, commit and push the updates. If things do not look good refer to the troubleshooting section below.
- 🎉 Congrats! The site has been updated successfully.
If a WordPress Update has Introduced New Core Blocks
If this happens, double check that this block doesn’t interfere with the current build. If it’s problematic and will lead to confusion for the client, add it to the ban list:
- Open
includes/blockeditor.phpfile - Look for an array called $blocklist. This contains almost all blocks in WordPress. Blocks that are commented out are allowed. Those not commented out are banned.
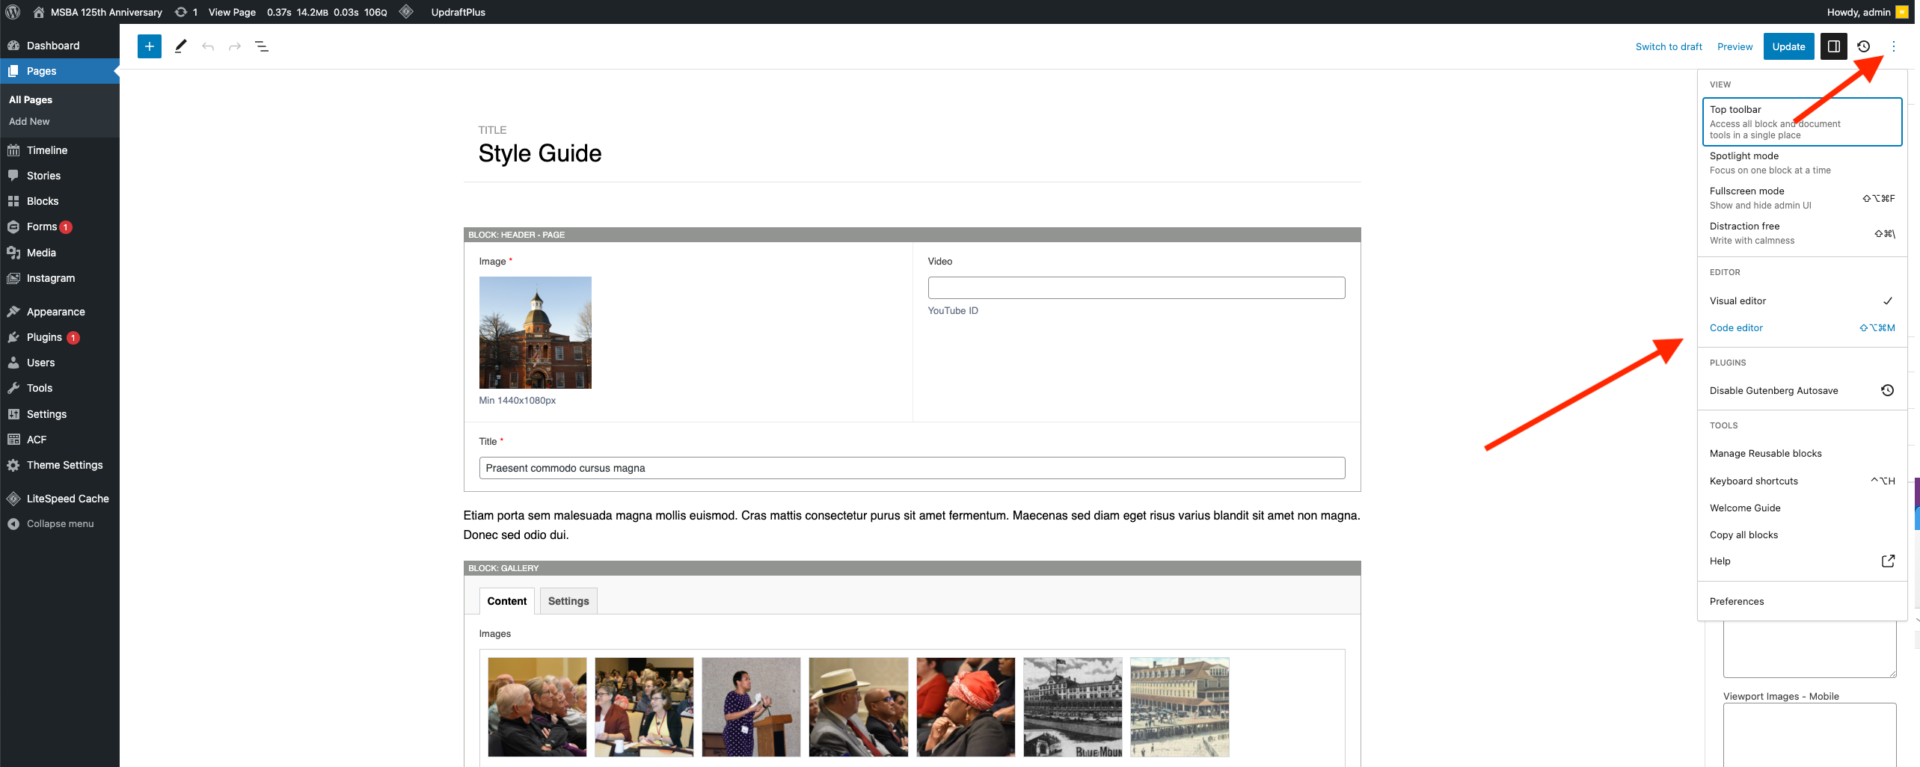
- Add the new block to this list. Its name will always be prefixed with ‘core/’. To find its name, you can edit a page and add the block. Then switch to the code editor and find its name in the meta (or you can try and guess it).
- Test that the block no longer displays in the block list and cannot be added to the page.
Troubleshooting
If an update breaks the site:
- Revert back to the last commit and see if the site is still broken. This will blow away any updates that were run but a stable site is more important.
# Can be used to revert back to the last commit
git reset {COMMIT HASH} --hard- After ensuring the live site is working again, set up a local copy of the site using the repo, live database, and live uploads. This will allow you to update and debug in a safe environment.
- If all else fails PANIC!!!!!!! JK, take a deep breath and phone a friend, because at the end of the day, it’s just a website and we can figure it out!